Quest 12
Active Quest: Miscarcand
So, what’re you waiting for? Exit the Temple and travel to Miscarcand SW of your current position. Come on chop, chop!
Miscarcand
Once you reach the ruins Miscarcand, take out the few Goblins that patrol the vicinity and then search the premises for numerous chests before making your way up the steps in the centre of the ruins itself and then head down the circular staircase leading you to the main door of the stronghold.
Once inside, head forwards down the corridor and then proceed down the steps to your right, at which point take out the lone ‘Bitterfish Goblin Berserker’ situated at the bottom. Continue forwards through the archway into the following room and then proceed through the subsequent archway further along. Follow the passageway round to the right and forget about the two gates on your left for now, instead, head through the next archway to the North and deal with the lone ‘Skeleton Hero’ here. Advance down the steps up ahead and into the next large room where two Zombies will be awaiting your arrival; quickly dispose of them and then search this large area for useful items and weapons – make sure you search the bodies of fallen Goblins! Once you’ve collected everything of use here, exit the room and retrace your steps back to the gates. On your way back, open up the second you come across (the South ‘Gate’), walk down the steps and deal with lone Zombie Guardian towards the bottom. Proceed forwards, across the stone bridge and jump down onto the lower level either to your left or right. Once positioned on the lower level, head East, further into this large region and dispose of the two Skeleton’s roaming around by the Stone Benches. Collect the Welkynd Stones from the four pillars and then make your way West. Before advancing through the next archway, quickly take a left turn and collect the items from the two chests located in the small inlet here. Now then, proceed down the West tunnel, make your way up the steps and deal with the ‘Bitterfish Goblin Shaman’, ‘Skirmisher’ and anything that the Shaman will summon – being it a mage-like creature or warriors!
Collect all the goods scattered around this small encampment and then push in the ‘Block’ located on the far East wall to open up the Gate across the stone-bride, thus enabling you to pass. Proceed up the steps to the North and then stand on the small pressure panel on the floor to open up the gate in front! Retrace your steps back to the bridge, cross it and head through the now-open gate towards the opposite end. Open up the door towards the far end leading you into the ‘Sel Vanua’ and walk through.
Miscarcand, Sel Vanua
Make your way down the flight of steps in front and head into the next large room where you’ll be attacked by a large number of Skeletons and Goblins, of all classes! Perform some Protection spells and Summoning spells if they’re available to you to make life easier and quickly dispose of the large assembly of creatures here! Collect any useful items and weapons that they may drop and then collect the Welkynd Stone from the pillar on the South wall. Now, push the Block on the East wall to raise the cage in the centre of this room and then retrieve the ‘Varla Stone’ from within! Advance down the South path and head through the gate towards the end. Head down the steps to your left and deal with solitary ‘Dread Zombie’ situated at the bottom. Follow the passageway round into the next room and make your way towards the opposite end of this higher level, making sure you collect all the Welkynd Stones to your left along the way! Cross the Stone Bridge towards the end and picklock the ‘Ayleid Coffer’ in the small inlet to your right and collect the goods from within. Proceed further along the bridge and deal both the Skeleton and Zombie who appear from round the following corner. Head into the subsequent room and take care of the lone Zombie just inside the gate. Advance down the South passageway and collect the items from the ‘Ayleid Reliquary’ positioned in the small hole to your right – make sure you collect the Ring!
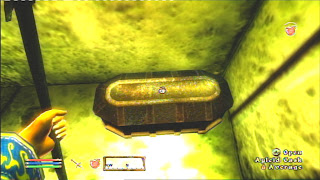
Continue through the next gate and again follow the hallway right the way round until you come to another movable ‘Block’ on the left wall; push the Block to open a remotely operated gate further along your journey. And the proceed into the following room by heading through the archway. Once here, take out the few Skeletons that patrol the vicinity before making your way further North into the subsequent section of this large area, where you’ll be presented by a few more Skeletons; deal with them quickly and stock up on goods from their remains! Before advancing through the tomb, quickly stock up Welkynd Stones in this area and then head down the West tunnel and up the long flight of steps. Quickly step on the pressure pad positioned on the floor to open up the gate ahead and then retrace your steps back into the large room you were previously in. This time take the North tunnel into the following smaller room and deal with the two Zombies that await you here. Collect the goods from the chest to your right and head through the door in front leading you into the ‘Morimath’.
Miscarcand, Morimath
Walk to the top of steps in front and follow the narrow hallway to the opposite end. Take the next set of steps to the bottom and deal with the Zombies standing at the bottom. Forget about the right path, as there is absolutely nothing down there – simply to waste your time, which, I believe is slightly out of order baring in mind you have a Quest to complete! “Sigh”. So then, face left, and take the North path towards the opposite end and dispose of the two Zombie round the next corner. Proceed further down the hallway and collect the items from the two containers on either side and then make your way towards the opposite end. Turn left into the centre section and walk up to the ‘Great Welkynd Stone’ in the centre of the contraption. Right, before retrieving the stone, prepare yourself for a battle! Immediately after taking the stone, the steps from the lower level will raise and two Zombies will appear from them; also from the North tunnel, the ‘King of Miscarcand’ will appear from the archway and the battle will begin! The Zombies, like usual, shouldn’t prove too difficult, however, the ‘King of Miscarcand’ has numerous spells available to him, as well as resistance to most magic!
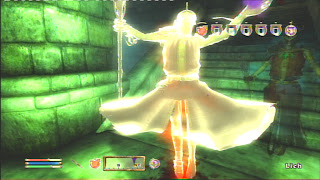
Weapons of any sort tend to work well for melee fighters and fire-based spells tend to work for mages! Quickly defeat the King before working on the Zombies, as he will cause the most damage! If he starts to get the better of you, then remember to stock up on health either with ‘Health’ spells or potions! Take care of the Zombies and then search the King’s body for some useful - and rare - items, paying close attention to his Staff and the ‘Key’! Head back along the North path on the higher level and you’ll notice that a secret door has opened, at which the King was residing in. Head into the room and stand on the pressure pad to open up another two hidden passages leading into a secret room to your right and an escape tunnel to your left; deal with the lone Zombie that appears from the right and then open up the ‘Cask’ on the coffin to collect the items from inside. Retrieve the Welkynd stone from the pillar and advance through the now-opened tunnel into the small hidden room on your right. Collect the items from the two chests and then make your way down the left tunnel. Use the ‘Miscarcand Key’ that you obtained from the fallen King to open up the door in front and head through. Proceed up the steps ahead and take care of the lone Zombie situated to the top. Continue forwards and then take the small narrow tunnel to your left all the way round until you come to another small flight of steps. Make your way to the very top and then up the second set where you’ll be presented with two Zombies, one from the right and one from the left. Deal with them both and then head into both rooms, to your left and right, and collect all the items from the numerous chests. When you’re finished collecting, head back to the junction and take the West steps to the top. Once you reach the top of the following set of steps, open up the door in front and proceed through back onto the first floor of Miscarcand.
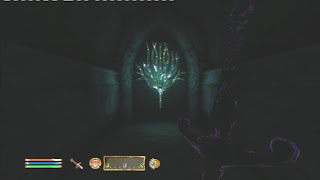
Miscarcand
Picklock the Ayleid Reliquary to your right and collect the rare items from within and then collect the goods from the chest to your left. Once you’re done here, continue forwards and stand on the pressure pad to open up the secret-movable wall in front. Head through the tunnel and…I think you know where you are now! Clever ay? Exit the tomb, back outside and travel back to a town to sell up if needs be. If not, then simply make your way back to Martin, up at Cloud Ruler Temple!
Cloud Ruler Temple
Locate Martin – who looks a bit like a ‘G’ all dressed up in the ‘Armour of Tiber Septim’ – ‘Bling, Bling’ - and [Give him the Great Welkynd Stone].
Quest 12: ‘Miscarcand’ Complete
No comments:
Post a Comment