Head into the Temple itself and locate Jauffre and Martin; speak with them both to receive your next two Quests, and select the ‘Allies for Bruma’ as your current Quest.
Quest 14
Active Quest: Allies for Bruma
Now then, Jauffre doubts the Bruma’s defence against a full-scale attack from the Mythic Dawn and believes that it would be a good idea to recruit the other cities Guards to aid us in a full-scale war! First lets begin with the Imperial City! Exit the Temple and proceed in that direction!

Imperial City, Palace. Green Emperor Way
Make your way towards the City Palace and proceed through the door into the ‘Elder Council Chambers’.
Elder Council Chambers
Inside you’ll locate ‘High Chancellor Ocato’ walking around; find him and speak to him about the ‘Aid for Bruma’! He will deny you an army due to his current duties and informs you that their army is already swamped with their own battles; after this conversation, exit the building you’re currently in and make your way NE towards ‘Castle Chorrol’ in search for ‘Countess Arriana Valga’.

Castle Chorrol Great Hall
Once inside the Great Hall, walk forwards into the subsequent room and go speak with ‘Countess’ who’s sat on her throne up ahead. Once you’ve located her, enquire about help for the Bruma defence to update your current Quest. She’ll decline your request for the moment and inform you that she’s more than happy to lend a helping hand once Chorrol’s own problems have been dealt with – in this case, an Oblivion Gate situated just outside the walls of Chorrol! To receive help from Chorrols’ Army, their own problems must be dealt with first, thus your requirements are – as I’m sure you can probably guess – to close the Gate! Exit the Castle’s Great Hall and head out of the Chorrol through the South gate, and make your way further South towards the Oblivion gate that burns in the distance, located just up from the ‘North Country Stables’. Deal with any hostile Daedric targets guarding the entrance and then head into the Plane!
Chorrol’s Oblivion Gate!
Wastes of Oblivion
Once you enter the Oblivion Plane, turn to your right and follow the path NW until a lone Spider Daedra comes into view up ahead, at which point, dispose of it quickly and continue forwards. Look to your right and you’ll notice a small crumbled piece of wall; head in that direction (NW) and jump up onto remnants of the wall.

Now then, you may have to sacrifice a small amount of health for this but don’t worry it won’t kill you, and it’ll all be worth it in the end, believe me! Jump across as far as you can in the direction of the subsequent island and then hastily run and jump the rest of the way. Once you’re safely on this part of the island, proceed NW further along the platform you’re currently on and make your way towards the far end. Watch out the for the multiple ‘Mines’ scattered around the place - as they will cause a large amount of unnecessary damage - and then head towards the far NE end. Drop down the off the rocks onto the lower level where you’ll locate a door hidden in the rocks leading you into ‘The Fume Vaults’! Head through once you’ve successfully located it!
The Fume Faults
Once inside, make your way round the corner to the left and proceed down the tunnel to the East. Deal with the solitary Daedroth situated to the bottom and then advance through this maze-like cave to the SE. A lone ‘Xivilai’ will appear in the distance; watch out for its magical attacks and the creatures that it’s able to summon and then quickly dispose of him before continuing forwards. You’ll then come to a door leading you into ‘The Embers of Hatred’ with another lone Xivilai guarding the entrance. Take him out and forget about this door the moment, instead, make your way NW, following the passageway down into the subsequent smaller room and take care of the Daedroth here. Collect the goods from the Fleshy Pod in the far corner and then retrace your steps back to the door. Once there, proceed through.
The Embers of Hatred
Walk into the next room once the flashy doors open up ahead and dispose of the first ‘Dremora Hatred Keeper’ that heads your way!
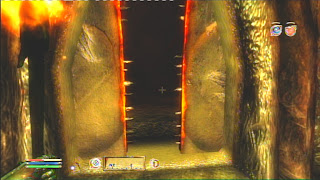
Collect ‘The First Key of Dark Hate’ from the corpse afterwards and hunt down the second Keeper! Take him out and make sure that you collect ‘The Second Key of Dark Hatred’ from this body! Once you’ve collected both of the required keys, head round the opposite side of the inferno and proceed through the SE door, into the ‘Halls of Dark Hate’ by using the first of the two keys!
Halls of Dark Hate
Once inside, work your way to the very top of this area by heading up the long and tedious slopes, either to your left or right. There are no Daedric creatures in this section and both paths ultimately lead to the exact same place anyway. When you reach the top, advance through the East door into the ‘Embers of Hatred’ by using the second key!
Embers of Hatred
Head to the top of the ramp and step onto the circular-Portal. Activate the Portal to transport you up to the higher level and then search the two ‘Punished’ hearts situated on either side of this platform. You’ll find some rare and useful items and weapons within; see, I told you it’ll all be worth it didn’t I – didn’t I? Retrieve the goods and retrace your steps back to ‘The Fume Faults’ and then finally back out into the Oblivion Plane!
Wastes of Oblivion
Work your back up the rocks towards the top and then retrace your steps back to the main portal where you first entered the plane! Again, head down the NW path where you encountered the first Spider Daedra and this time continue forwards and head through the two rocks to the NW and collect the goods from the two Fleshy Pods to your left hidden behind the rocks itself. Make your way back round to the opposite side, cross the small narrow bridge heading South and deal with the lone Storm Astronach awaiting your arrival at the opposite end!
Now head in the SE direction when the path splits into two and continue forwards towards the first door up ahead leading you into the ‘Tsunami’. Once there proceed inside.
Tsunami
Take out the lone Storm Astronach inside and then activate the ‘Corpse Masher’ and take it up to the higher level. Once on this platform, climb the long and winding path towards the very top and then activate the ‘Tornado Gate Control’ to open up the Tsunami Gate! Now then, head through the SE door back out into the Plane and follow the dangerously narrow bridge towards the opposite tower and head through the following door.
Portals of Natural Disaster
Once inside, collect the goods from the Punished, and then head through the first door to your right. Make your way, again, towards the opposite tower and head through the following door leading you into the ‘Tornado’!
Tornado
Activate ‘The Cage Master’ to release the caged-prisoner and then take the ramp down towards the very bottom and then activate the ‘Ascension Call’ to bring the Corpse Masher up to your position. Take it to the ground floor and dispose of the Xivilai situated here. Collect the rare necklace from the Mythic Dawn Guard that you released and then search the Punished before heading back up to the higher ledge. Take the path right to the very top again, and head through the door once again leading you back out into the Wastes of Oblivion. Make your way towards the opposite end of the bridge and re-enter the Portals of Natural Disaster.
Portals of Natural Disaster
Work your way round to the right of this large circular room and head through the first door you come to. Again, take the narrow bridge towards the opposite tower and head through into the ‘Landslide’.
Landslide
Activate the ‘Eruption Gate Control’ inside to open up the Landslide Gate and then head down the long ramp towards the bottom. Activate the ‘Ascension Call’ on the wall and take the Corpse masher to the very bottom and deal with the Storm Astronach here.
Retrieve the gold from with the Punished and then head back up to the higher ledge. Make your way back up to the very top once again and then take the bridge back over to the opposite tower.
Portals of Natural Disaster
Once inside, again head to the right and proceed through the final door after collecting the goods from the Punished. Again, continue across the bridge into the tower of ‘Eruption’.
Eruption
Activate the ‘Landslide Gate Control’ inside to open up the Eruption Gate and then activate the ‘Cage Master’ next to it. Head to the very bottom of the tower and take out the ‘Dremora Markynaz’ who will most likely be invisible due to his ‘Base Ring of Shadows’! Locate him and defeat him before searching his body for the rare items!
Once you’re done here, head back up the tower to the very top and back across the bridge into the subsequent tower opposite.
Tornado
Once inside, take the bridge leading across into the Tornado tower and exit via the door towards the very bottom!
Wastes of Oblivion
Take out the Storm Astronach outside and walk forwards towards the end of this short bridge. Take the left path and follow the paths indentations round into the subsequent large area and continue NE towards the now-opened gate! Deal with the two Daedroth’s in this area and then head through the large gates into the next section of the island – mind out for the numerous Mines scattered throughout! Located just on the other side of the large gates are two Storm Astronach’s; dispose of them quickly before entering into the ‘Earthquake’ tower just up ahead.
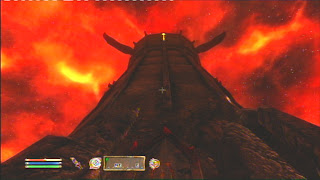
Earthquake
Once inside, a lone Xivilai will head in your direction; quickly take him out and collect any useful items from the corpse afterwards, before taking the Corpse Masher up to the next level! Once on this platform, take the ramp half way up and head through the first door you come to leading you back out in the Plane. Take the bridge towards the opposite tower and head through the door into the lower level of the Portals of Natural Disaster.
Portals of Natural Disaster
Once inside, work your way round to the left and head through the second door along, forgetting about the door leading into the ‘Rending Halls’ for the moment! Follow the bridge towards the opposite side and head into the ‘Hurricane’ tower.
Hurricane
Head to the top of the tower and deal with the solitary Storm Astornach here and then replenish your health if needs be by using the Fountain!
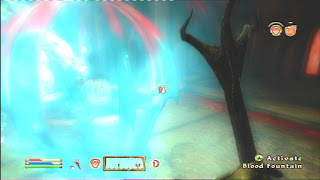
Once you’re finished up here, make your way carefully to the very bottom of the tower by activating the Ascension Call on the far wall and taking the Corpse Masher down to the ground floor. Eliminate the Dremora Markynaz down here and then retrace your steps back up to the top, across the bridge and back into the Portals of Natural Disasters. This time, make your way into the Rending Halls!
Rending Halls
Before entering the Rending Halls, quickly perform some Protection spells if you can! The reason for this is, immediately after entering, a Daedroth, Xavilai and two Dremora Markynaz will be waiting! There are two Magicka Essences and a Blood Fountain situated here if needs be. Take out the hostile Daedric creatures one at a time and then collect the goods from the bodies afterwards! Once you’re finished here, head down either one of the tunnels to the NW or SE and watch out for the protruding spikes from either side of the walls half way down. Once you reach the bottom, head into the lower level of the Portals of Natural Disaster.
Portals of natural Disaster
Again you have another tough battle ahead; immediately after entering you’ll be attacked by a Dremora Kynreeve, Dremora Kynmarcher and two Storm Astonach’s! Do whatever you have to do to survive and take them out on by one!
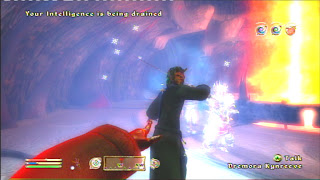
Collect any useful items after and then head through the opposite door up ahead leading you back into the Rending Halls!
Rending Halls
Make your way back up the slope and into the room you were previously in. From here, head through the door in the centre of the two Magicka Essences leading you into the ‘Citadel Hall’.
Citadel Hall
Proceed up the slope and activate the ‘Claw Lever’ on the right wall to bring the large sword-like traps down! Once this happens, quickly and carefully make your way towards the opposite end just as the swords are about to rise! Head through the small tunnel at the end and then collect the items from the two Punished hearts located on either side of the subsequent hall.
Portals of Natural Disaster
Head through either one of the doors here so that you’re back into the Portal, and then work your way up the following ramp.
Proceed through the door towards the top and head into the ‘Corridors of Dark Salvation’.
Corridors of Dark Salvation
Head up the right ramp and deal with the lone Dremora Kynmarcher situated in the next room. Continue up the following ramp and dispose of the solitary Xivilai positioned up ahead. Head back down the opposite ramp quickly before advancing and take out the next Xivilai here. Retrace your steps back up to the top and proceed through the East door into the Portals of Natural Disaster once again.
Portals of Natural Disaster
Immediately after entering, two Xavilai will attack from either side, left and right! They also have a tendency to summon Clanfear’s to aid them in battle; dispose of them quickly and then head up either side of the ramp. Head through either one of the doors up here into the Sigillum Sanguis!
Sigillum Sanguis
Follow the bizarre corridor round and then proceed into the large circular room up ahead. Advance up the bloody-spiked steps and deal with the two Dremora Kynval that appear from the next level up!
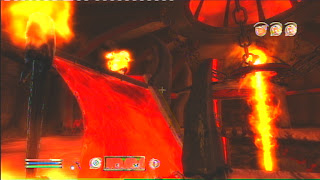
Once you’ve cleared the area of all hostiles, advance up the blood-ramp to the highest point; collect the useful rare items from the Punished and head over in the direction of the ‘Sigil Stone’ that burns in the centre of the inferno! Activate the Stone to complete the first section of the Quest and thus shutting the Oblivion Gate for good!
Gate to Oblivion Successfully Closed!
No comments:
Post a Comment